My 56 LP Custom Build !

  • Thread starter SG Lou
  • Start date
  • This site may earn a commission from merchant affiliate links like Ebay, Amazon, and others.

SG Lou

Senior Member
Joined
Apr 3, 2009
Messages
2,676
Reaction score
1,842
I’m going to attempt to build a 56 LP Custom Replica for myself. I have always loved the Custom and something about the Alnico V pickup makes the guitar look even cooler.
Now for the REAL reason of building it. A few yrs ago Bill Fischer was offering the Forum a deal on Mahogany body and neck blanks. So I jumped on the offer with the intent to build a 59 Replica. In the process of cutting and routing and not paying attention I SCREWED the template to the back of the body blank to route out the control cavitys. Stupid mistake but now I was left with 2 screw holes in the back of the body.
NOT GOOD if your going to build a Standard. So after some debating I decided that
I’ll veneer the back to cover the holes and build a Custom instead.

OK, Enough with the chatter, on to the pics !

56LP001.jpg


Back of body showing the veneer.

56LP002.jpg


Yes it’s a separate Mahogany top. Like I said, this started out to be a Standard with a Maple Top. I got a piece of Mahogany off of ebay and had the guy resaw it for me
so I can have a ¾” thick piece for the top. He also sent the remainder which turned out to be just a hair less then ¼” thick. Little did I realize that I’ll be incorporating THAT piece into this build…More on that later.

56LP001.jpg


Nasty tear out which I was able to repair. Again, it’s going to be painted Black so no one will see it ! ( I HOPE ! )

56LP003.jpg


So in my haste to get going on this I did not shoot any pics of the actual routing / contouring of the top or doing the neck plane routing. Sorry !

56LP004.jpg


56LP005.jpg


Back of body showing Binding route completed.
Notice the difference in color and grain pattern between these 2 pictures of the back?

56LP006.jpg


56LP002.jpg


I didn’t like the look of the veneer so I ran the body through the Thickness Planner, took off the same amount of wood as the binding is thick and glued up that left over ¼” piece I had from the top wood to the back. Once it was dry I shaped it and routed out the cavity openings.
( OK, so this build is already far from being ACCURATE ! )
 

SG Lou

Senior Member
Joined
Apr 3, 2009
Messages
2,676
Reaction score
1,842
Got all of my binding in so on to that. I made my own binding laminating gig and proceeded to laminate the 4 .020 thick bindings ( W/B/W/B ) together with acetone.
Worked like a charm !

56LP0022.jpg


56LP0023.jpg


56LP0024.jpg


Binding being glued into the route.

56LP0025.jpg


56LP0026.jpg


Corners mitered….WHAT A PAIN but came out pretty good considering I have no clue what I’m doing !

56LP0027.jpg


56LP0028.jpg


Rear Binding glue up done !

56LP0029.jpg


56LP0030.jpg


More to come !
 

TheZ

Senior Member
Joined
Nov 9, 2009
Messages
1,105
Reaction score
738
You always do such meticulous work, I'm excited to see what comes next!
 

macklanders

Senior Member
Joined
Jun 17, 2009
Messages
245
Reaction score
20
It's great to see more LP Custom build threads....and a '56 (my favorite :applause:) to boot! Can't wait to see more.:thumb:
 

emoney

Senior Member
Joined
Jan 31, 2010
Messages
7,578
Reaction score
3,974
Sure looks like you DO know what you're doing, by the way.:thumb:
 

TKOjams

Senior Member
Joined
Sep 12, 2009
Messages
10,060
Reaction score
6,838
Been waiting for this thread!!! :applause:
 

SG Lou

Senior Member
Joined
Apr 3, 2009
Messages
2,676
Reaction score
1,842
OK, Let’s move on to the fingerboard.

I’m going to try and do EVERYTHING from scratch on this build but I have to admit, for the price Stew-Mac sells a great slotted Ebony FB so it was a no brainer for me.
Stew-Mac board it is !

Inlay positions marked out

56LP007.jpg


Cut my own inlays

56LP008.jpg


Inlays cut, inlay cavities routed out

56LP009.jpg


Glued in and level sanded. A little filling will be needed around a couple of inlays but overall they came out great.

56LP0011.jpg


Filled and sanded

56LP0012.jpg


56LP0018.jpg
 

SG Lou

Senior Member
Joined
Apr 3, 2009
Messages
2,676
Reaction score
1,842
I used my handy dandy Taper Jig to cut the FB taper. First off, the Jig is 4” wide. I set the table saw fence to the 4” then mark to center line on the back side of the FB.
From there I divide the final width I want on both top and bottom ( 1 11/16” for the top and 2 ¼” for the bottom ) and mark each end of the FB minus the thickness of the binding.

Align the top and bottom mark and cut the fist taper.

56LP0014.jpg


56LP0015.jpg


Run it through the saw, flip the board, repeat and both sides are tapered

56LP0017.jpg


Tapering done

56LP0018.jpg


Polished, Oiled and ready for Frets

56LP0019.jpg


Frets installed, excess wire filed flush on both sides,
ready for binding glue up !

56LP0020.jpg


56LP0021.jpg
 

SG Lou

Senior Member
Joined
Apr 3, 2009
Messages
2,676
Reaction score
1,842
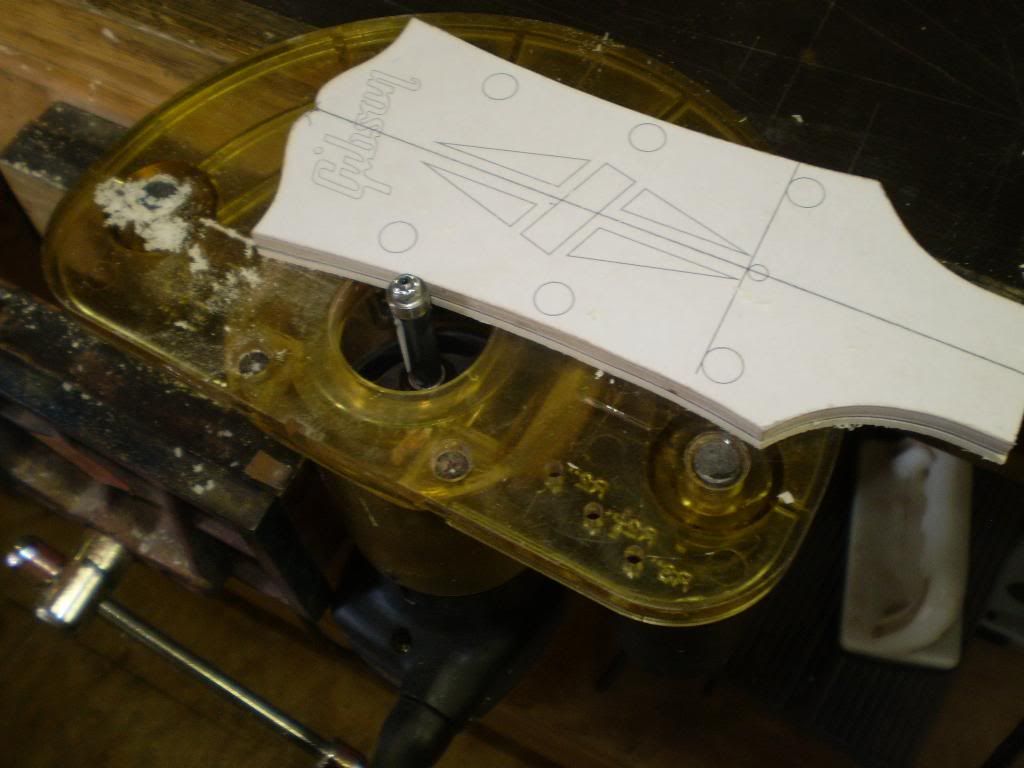
Now, I was going to use a pre made headstock overlay but it would look period correct as the size and shape is different. With that I decide to tackle the job of making my own overlay. This was by far, probably the hardest thing I have ever done as far as guitar work is concerned because I’m working with something that has to be only 3/32” thick.
So here goes !

Holly Veneer slightly thicker then 3/32” TR access measured out and cut

56LP0035.jpg


56LP0036.jpg


Made 2 templates from an accurately drawn 56 headstock. One template is cut to the actual size, the other cut .150 smaller for the binding.

56LP0033.jpg


56LP0034.jpg


Left over binding was cut on the band saw using a fence so it’s cut slightly taller then 3/32’. Then using the smaller template and a heat gun I pre-shaped each piece of binding.

56LP0031.jpg


Headstock veneer routed to shape

56LP0037.jpg


I glued up a piece of Formica to a ½ piece of plywood to act as my binding gluing platform. I applied a heavy coat of Carnuaba wax to the Formica so the glue wouldn’t stick to it from squeeze out.

56LP0038.jpg


Let the glue up begin with the sides first.

56LP0039.jpg


Then the bottom after the mites were cut

56LP0040.jpg
 

SG Lou

Senior Member
Joined
Apr 3, 2009
Messages
2,676
Reaction score
1,842
Then the top

56LP0041.jpg


4 plys glued up, ready for the 5th thicker piece. The shaping for the thicker piece was done the same way as the thinner pieces

56LP0042.jpg


Last of the binding glued up and scraped flush. What I still have to do is sand it to it’s final thickness.

56LP0044.jpg


56LP0045.jpg


56LP0046.jpg


This is as far as I have gotten on the build. It won’t be a fast paced build as I got other things going on at home but eventually it will get done before this summer is over !
 
Joined
Feb 3, 2007
Messages
12,299
Reaction score
5,641
SWEET!!!

Bursts are super nice and all, but to me they don't hold a candle to the original Custom. Classiest guitar ever made.
 

TKOjams

Senior Member
Joined
Sep 12, 2009
Messages
10,060
Reaction score
6,838
Looking good Lou, Nice job on the binding!!:thumb:
 

Blackdog

Senior Member
Joined
Sep 6, 2009
Messages
569
Reaction score
839
This is looking really good ! Good job with the headstock binding, it is really clean !

I agree with the others, we definitely NEED more Custom builds !

Do you already have the Staple-Alnico V pickup ? May I ask where did you get it from ? I went Seymour Duncan Custom Shop for mine. It looks perfect and I expect it to sound good, but (all considered) it's the single most expensive pickup I have ever bought...

BTW, I made a "reasonably correct" plan for the Staple/P90 cavities' template, let me know if you think you may find it useful and I'll email you the pdf.
 

Latest Threads


Top
')